Scaling Infrastructure as Code - Terraform Learnings
At Shipsy we have created sustainable and scalable processes for using Terraform to manage complex cloud infrastructure
At Shispy we empower global businesses to optimize, automate, track and simplify end-to-end logistics and supply chain operations using our smart logistics management platforms. To enable this, we are handling complex cloud infrastructure at a massive scale.
We soon realized that it would be challenging for the infrastructure team to create, configure and handle the cloud infrastructure manually. So, the logical conclusion was Infrastructure as Code. We started using Terraform as our tool for Infrastructure as Code implementation.
In this article, we will explain the processes that we created for easy usability and scalability. Innovation and first principles thinking were key factors that empowered us to address scalability issues.
1. State File Management
Terraform keeps a state file (with the name terraform.tfstate in the folder where you run terraform apply) in which it stores the current state for infrastructure resources being managed by it. Whenever we run terraform plan or terraform apply, it compares our code with the data in the state file and tries to sync them. Now, this introduced us to the following issues when terraform was used in the production.
Every member of the team needed the updated copy of the state file for creating the infrastructure
Resolve conflicts when multiple team members are trying to update the state file
Reverting back to the previous version in case of a big blunder was a mess
Soon we realized one important thing we need to do is keep the state file at a remote location where anyone working on the infrastructure can access it. This removed the need to keep different copies of the state file with each infrastructure developer. Additionally, we needed the locking facility so that simultaneous updates to the state files do not cause headaches for us.
Fortunately, terraform indigenously supports this via Terraform Backend. Terraform Backend simply controls how the terraform stores and loads the state. Terraform supports many backends such as Amazon S3, Google Cloud Storage, Terraform Enterprise, etc. Almost all the remote backends also give us the facility of locks. Terraform will get the lock on the state file before running terraform apply, all other requests for the file will have to wait until this operation is either completed or aborted.
We chose Amazon S3 in combination with a dynamoDB table for locking state files. Further, we enabled versioning on our S3 bucket. So, now we have all the state files and can switch back to any of them almost instantaneously. After creating the S3 bucket and the dynamoDB table we just added the following code to enable the Terraform Backend:-
terraform {
 backend "s3" {
   bucket = "<your bucket name>"
   key    = "terraform.tfstate"
   region = "<region of your s3 bucket>"

   dynamodb_table = "<name of the dynamoDB table>"
   encrypt        = true
 }
}
2. Modules ( DRY )
We realized a lot of our terraform code was repetitive. For instance, the terraform code for creating a new AWS Batch service was almost the same for dev, staging, and production environments. Even in the same environment, there were a lot of common steps for creating different Batch jobs.
In other programming languages, we usually create a function for the repetitive code and then just call it from all the places. Similarly, Terraform provides us Terraform Modules, which can be written once and then called multiple times.
resource "aws_batch_job_definition" "main" {
   name = local.batch_job_name
   type = var.job_type
   platform_capabilities = var.platform_capabilities
   container_properties = jsonencode({
       command = var.command
       image = local.container_image
       jobRoleArn = var.job_role_arn
       memory = var.memory
       vcpus = var.vcpus
       environment  = local.environment
   })

   tags = local.final_tag
}

// schedule the job

resource "aws_cloudwatch_event_rule" "event_rule" {
   name                = "${title(local.environment_type)}Schedule_${var.name}"
   description         = "Cloudwatch Rule for ${local.batch_job_name}"
   schedule_expression = "cron(${var.cron_parameter})"
}

resource "aws_cloudwatch_event_target" "event_target" {
 rule      = aws_cloudwatch_event_rule.event_rule.name
 batch_target {
   job_definition = aws_batch_job_definition.main.arn
   job_name = local.batch_job_name
 }
 role_arn = var.cloudwatch_event_job_role_arn

 // get the arn of the queue based on the environment
 arn = lookup(local.batch_queue_arn, terraform.workspace)
}
Now the above code can be called anytime we need to create an AWS Batch job.
module "batch_job" {
 source = "../../../../modules/aws-batch"

 name           = "test-script"
 vcpus          = 1
 memory         = 256
 cron_parameter = "30 4 ? * MON *"
}
Additionally, it abstracted out a lot of implementation details. Now, all our engineers write the script's name, resource requirements, and the cron parameters. This has reduced the script deployment time after production merges from 3 hours to 5 mins. We have written modules for all the infrastructure components.
3. Environment Isolation
As an organization, our philosophy is of learning through experimentation. So almost all the engineers perform numerous experiments which sometimes cause issues. In order to allow these experiments and keep our systems healthy, we have isolated our environments. Ideally, we wanted our dev, staging, and production infrastructure and the corresponding state file to be fairly isolated. This isolation can be achieved in two ways. One is Terraform Workspaces and the other is the file structure of your terraform code.
3.1 Terraform Workspace
Terraform workspaces provide us separate state maintenance. The most interesting aspect is, terraform creates separate state files for each workspace. Initially, you start in the “default” workspace.
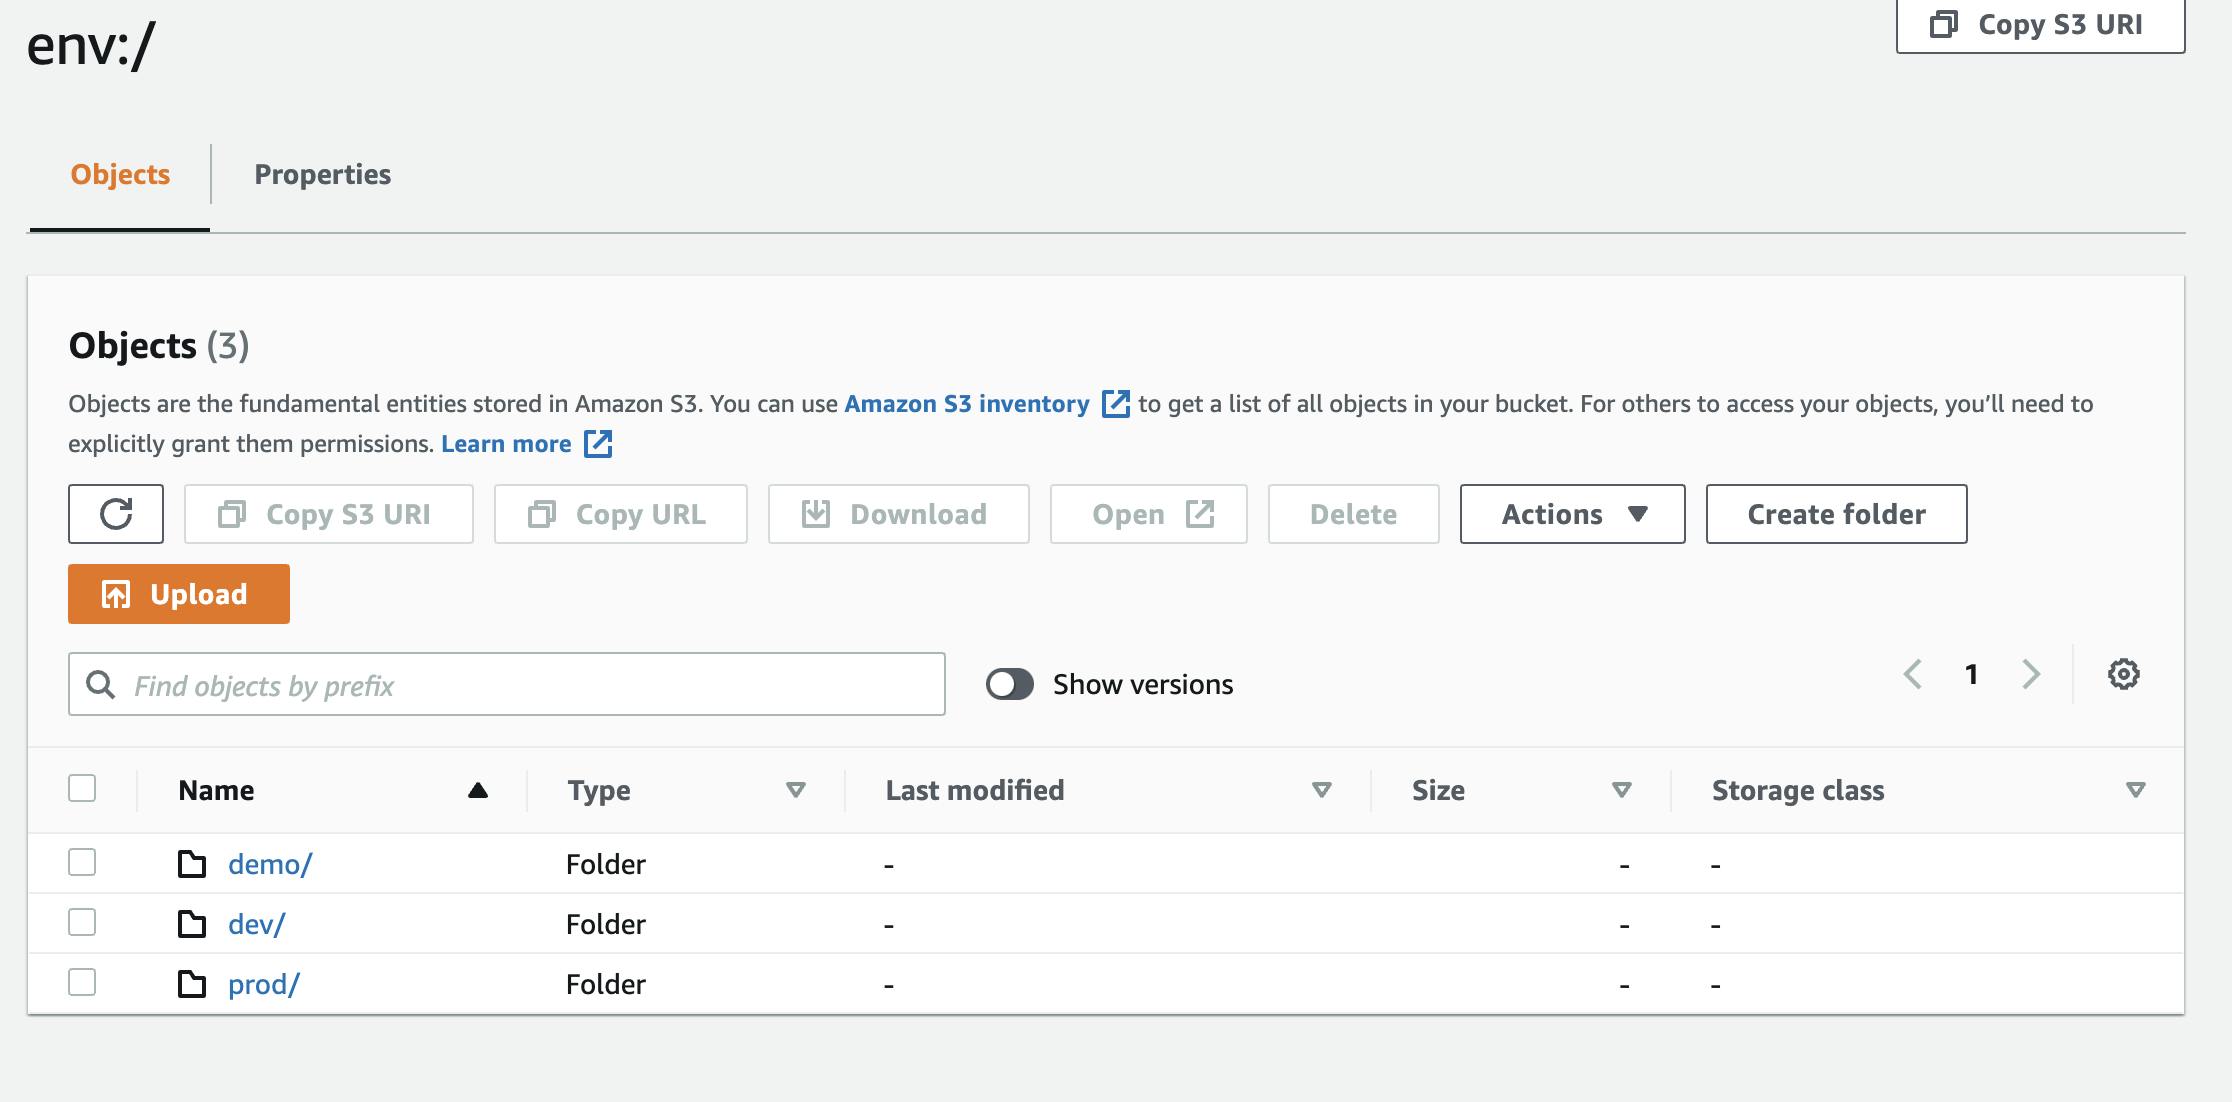
With the command terraform workspace new <workspace name> you can create a new workspace. Then terraform will automatically create an “env:” folder and will put the state file for this workspace in the AWS S3 bucket we are using for state files. You can switch workspace using terraform workspace select <workspace name>
Leveraging this information, we created three different workspaces, one for each dev, demo, and production. So now we are sure that any change in the dev or staging environment will not impact our prod state file and hence production infrastructure.

3.2 File Structure
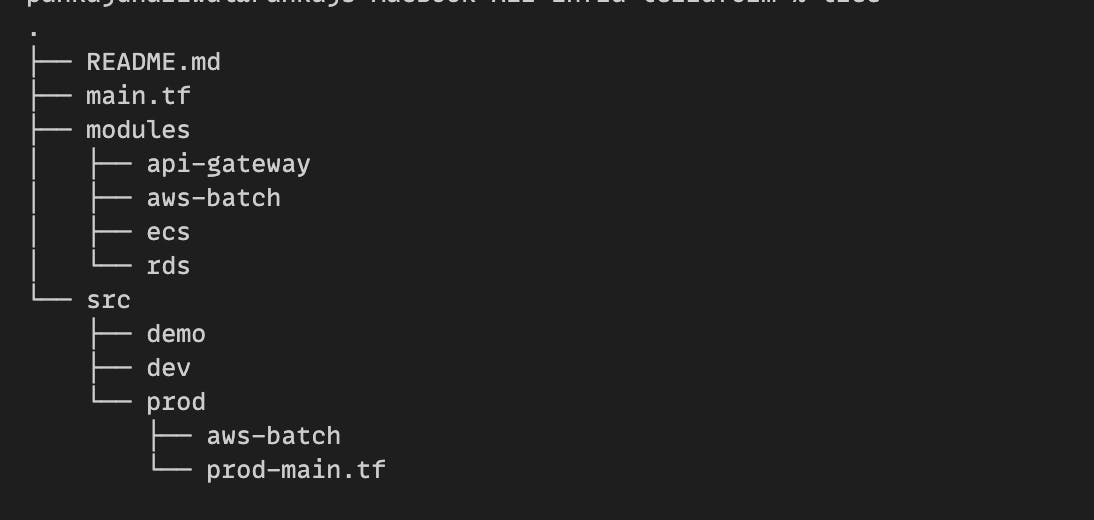
Terraform Workspaces are a good way to achieve isolation. However, they are almost invisible at the code level. This caused many bugs since the developer didn't know whether the code will run for production or staging environments. Therefore, we have separate folders for each environment and then each resource type has its own folder. This brings out greater transparency for the developers and reduces the chances of wrong commits (i.e. code for staging pushed to production).

4. Deployment Pipelines
Creating infrastructure from developers' local machines using terraform apply initially worked smoothly. But as we scaled we realized this process had some limitations, like:-
Opaque:- anyone could run the terraform apply, even sometimes without the PR review
Scalability:- all developers changing infrastructure at the same time created chaos
- Permission Management:- everyone needed almost full write permission which could have been catastrophic
So we decided to create Jenkins Pipelines for the infrastructure creation using terraform. Our flow now involves:-
Creating a branch from the production branch
Making your changes
Running a Jenkins pipeline to create a plan (output will show the changes that will happen in the infrastructure if this PR is merged)
Creating a PR request and putting the link of the above run pipeline in the description. This makes the reviewer's life easy as now they know what will happen if this PR is merged.
After the production merge, we run the Jenkins deployment. Our Jenkins deployment has an approval step. You need to read the plan and if you are satisfied with the plan then only the job will be complete.

- Created a user for Jenkins in the cloud provider and giving only this user the access to create infrastructure. This ensures that there is only one point of infrastructure modification across the organization
pipeline {
    agent {
        node {
            label 'master'
        }
    }
    stages {
        stage("initialize terraform") {
            steps {
                sh "terraform init"
            }
        }

        stage("switch the workspace") {
            steps {
                sh "terraform workspace select ${env_type} || terraform workspace new ${env_type}"
            }
        }

        stage("validate the config") {
            steps {
                sh "terraform validate"
            }
        }

        stage("create the plan") {
            steps {
                sh "terraform plan"
            }
        }

        stage('Approval') {
            steps {
                script {
                    approver  = input(id: 'confirm', message: 'Apply Terraform ?', submitter: '', submitterParameter: 'submitter')
                }
            }
        }

        stage("apply the plan") {
            steps {
                sh "terraform apply -auto-approve"
            }
        }
    }
}
5. Refactoring
Continuous refactoring of the code for improving readability and the hygiene of the code is the inevitable truth of modern software development. However, refactoring in terraform is a little tricky since this will make your code out of sync with the state file. Result? Unexpected changes to your infrastructure even leading to downtime in the worst case.
What's the solution then? Terraform provides few CLI commands for the management of the state file. One of them is terraform state mv <source> <destination> (.i.e terraform state move). Using this command we can edit the state file and make it in sync with our new code without changing any infrastructure.
terraform state mv 'module.create_app_clients.raven' 'module.create_app_clients.raven-main'
Interestingly, you can run terraform state mv -dry-run which won't change anything but will let you know what will happen if you move the state.
Even for the CLI commands, we have separate Jenkins pipelines. After your PR is merged in the production branch, the pipeline will run with the appropriate commands.
If you love to solve complex engineering problems like this one, we are hiring. Check out the open job positions here.

